Recent Post

No Mans Sky Manufacturing Facility Locations and Puzzle Rewards ...
Manufacturing facilities in No Man's Sky serve as crucial destinations for interstellar explorers seeking valuable blueprints and crafting recipes. These planetary structures are protected by armed Sentinels, making every infiltration an exciting operational task. Learning how to efficiently track these sites down and solve their internal security puzzles is essential for crafting high-tier products and expanding trade networks.
How to Locate Planetary Manufacturing Facilities
Finding manufacturing facilities requires travelers to use planetary charts obtained from space station cartographers. Specifically, purchasing secure site charts gives players direct navigation markers to hidden industrial outposts across planetary surfaces. Alternatively, signal boosters and exocraft scanners can reveal secure facility locations without spending navigation data.
Flying low over planetary terrain allows players to spot these distinct buildings visually by their reinforced steel doors. Scanning nearby structures from your starship helps verify whether a building is an active production site or an abandoned facility. Establishing planetary bases nearby can provide quick access to systems with high facility densities.
Breaching Security and Handling Sentinel Threats
Entering a manufacturing facility requires blowing open the reinforced main entrance before entering the control room. Using high-damage starship weapons or multi-tool weapons like the Blaze Javelin makes quick work of the heavy door plating. Once inside, indoor Sentinels usually disengage, allowing players to interact with the central console uninterrupted.
It is best to clear surrounding Sentinels or quickly slip inside the building to reset threat levels. Remaining passive while inside prevents additional waves of combat drones from spawning outside. Once the security terminal is operational, players can focus entirely on evaluating the emergency situation.
Solving Terminal Puzzles with Alien Languages
Interacting with the central terminal triggers a specific diagnostic prompt detailing an industrial emergency or system failure. Players must choose the correct response from multiple contextual options to override the facility security lock. Knowing the language of the local alien species significantly increases the chance of selecting the correct choice.
Understanding key terms related to temperature, pressure, or chemical elements helps travelers deduce the proper repair protocol. Selecting the incorrect action usually triggers a system shutdown or causes slight physical damage to the user. Successful overrides unlock full access to the station's primary data archives.
Unlocking Blueprints and Recipe Tree Rewards
Overriding the terminal successfully grants factory override units or immediate blueprint rewards. Factory override units allow players to manually select missing crafting blueprints directly from the extensive synthesis tree. High-value blueprints include components necessary for crafting expensive trade items like Stasis Devices and Fusion Igniters.
Certain puzzle solutions reward rare technology upgrades, nanites, or standing bonuses with planetary factions instead. Unlocking these specialized recipes early drastically enhances your ability to generate units throughout your galactic journey. Repeatedly visiting manufacturing facilities guarantees that players eventually master every advanced crafting recipe in the game.

How To Make Eggplant In Infinite Craft Combination Recipe And Steps ...
Infinite Craft offers players an endless sandbox where basic elements like Earth, Wind, Fire, and Water can be combined to unlock thousands of complex items, concepts, and foods. Among the vast array of culinary elements you can discover in the game, crafting an Eggplant is a fun milestone that unlocks numerous vegetable and dish recipes. Understanding the precise combination recipe and step-by-step process allows you to add this vibrant purple ingredient to your growing element library with ease.
Starting with the Essential Base Elements
To begin crafting an Eggplant, you need to establish a strong foundation using the basic starting elements. Combining Plant and Vegetable components is typically the most direct route to reaching specific botanical items. By merging Earth and Water, you will first generate Plant, which serves as the core building block for most agricultural discoveries.
Once you have unlocked Plant, continuing to layer environmental elements like Rain or Mud will expand your farming repertoire. Experimenting with combinations like Plant and Mud or Plant and Earth helps produce basic crops. Having these primary botanical components ready in your sidebar streamlines the entire crafting process.
Step-by-Step Recipe to Craft Eggplant
Creating Eggplant specifically requires bringing together a plant-based element with a purple or vegetable-focused modifier. Combining Plant with Purple or mixing Vegetable with Purple is one of the most reliable recipes in the game. If you do not have Purple yet, you can easily craft it by combining Fire and Water to create Steam, then working towards colors through Rainbow combinations.
Alternatively, combining Plant with Fruit or Vegetable can sometimes lead directly to specialized produce. Merging your basic Plant element with specific food concepts will refine the result until Eggplant appears. Once the element manifests on your screen, it becomes permanently saved for future crafting experiments.
Unlocking Further Recipes Using Eggplant
After successfully crafting Eggplant, you open up a wide range of new crafting opportunities within Infinite Craft. Combining Eggplant with Fire or Oven can yield delicious dishes like Parmesan or Roasted Eggplant. Mixing it with other vegetable elements allows you to discover full meal categories and complex recipes.
Furthermore, Eggplant can be combined with modern digital elements to unlock popular emojis and internet culture references. Merging Eggplant with Smartphone, Internet, or Emoji creates unique modern terms that expand your collection beyond traditional food items. Exploring these creative pairings is one of the most rewarding aspects of the game.
Tips for Efficient Crafting in Infinite Craft
If you ever get stuck while attempting to craft Eggplant, keeping your workspace organized is essential. Sorting your unlocked elements by category makes it much easier to test different combinations without cluttering your screen. If a specific recipe path feels too long, try combining broad concepts like Agriculture or Food with different colors.
Remember that Infinite Craft uses AI logic to generate results, which means there are often multiple valid pathways to reach the same item. Experimenting with related words and concepts can often lead to pleasant surprises and faster discoveries. Keep testing new combinations to see how far your botanical collection can grow.

Nintendo Switch Games For 7 Year Old Girl And Best Picks ...
Finding the right video games for young children requires balancing entertainment value with age-appropriate gameplay mechanics. Seven-year-old girls often enjoy titles that foster creativity, light problem-solving, and engaging storytelling without overly complex controls. The Nintendo Switch offers an impressive library of family-friendly titles perfectly tailored for early elementary school gamers.
Creative and Exploration Games for Kids
Games that encourage open-ended exploration allow young players to express themselves at their own comfortable pace. Titles like Animal Crossing: New Horizons offer a relaxed environment where players can decorate islands, catch colorful bugs, and interact with friendly animal neighbors. This gentle structure helps build confidence while keeping the experience completely stress-free.
Minecraft is another outstanding option that promotes spatial awareness and creative problem-solving through digital building blocks. In peaceful or creative mode, children can build imaginative structures without worrying about difficult enemies or health meters. It provides endless replay value while encouraging artistic expression in a digital playground.
Engaging Platformers and Action Adventures
Platforming games designed with beginner-friendly assist modes give young gamers the chance to develop hand-eye coordination. Kirby and the Forgotten Land delivers a charming 3D adventure featuring colorful environments and forgiving power-up abilities. Its accessible design ensures that players can navigate challenges without feeling overwhelmed by steep difficulty spikes.
Super Mario 3D World + Bowser’s Fury offers exciting multiplayer action that allows parents or older siblings to play alongside younger gamers. The game includes assist features that help characters navigate tricky jumps and avoid obstacles easily. Working together makes difficult levels far more manageable and creates fun family bonding moments.
Puzzle and Simulation Favorites
Life simulation games provide structured routines that reinforce reading comprehension and basic planning skills in young children. Disney Dreamlight Valley lets players build relationships with iconic characters while completing engaging quests and customizing their surroundings. The intuitive interface makes tracking goals straightforward for young minds.
Puzzle titles like Captain Toad: Treasure Tracker encourage thoughtful observation rather than fast-paced reaction times. Players navigate compact three-dimensional dioramas to collect hidden gems and reach the goal star safely. The clever camera controls and relaxed pacing make it a rewarding mental workout.
Key Features to Consider Before Buying
When selecting Nintendo Switch titles for a seven-year-old, reading requirements and co-op accessibility should remain top priorities. Many games offer full voice acting or minimal text, ensuring non-fluent readers can play independently without getting stuck. Checking parental control options also helps manage screen time and in-game interactions effectively.
Digital demo versions available on the Nintendo eShop allow parents to test gameplay mechanics before making a full purchase. Trying out samples ensures the game aligns well with a child's unique interests and skill level. Investing in games with adjustable difficulty modes guarantees long-term enjoyment as their gaming skills mature.

Witcher 3 A Knight's Tale Quest Walkthrough And Choices ...
The Witcher 3: Wild Hunt's Blood and Wine expansion offers many memorable side quests, but A Knight's Tale stands out for its tragic storytelling and moral ambiguity. Located in the picturesque region of Toussaint, this quest involves helping a nobleman resolve a curse haunting a weeping willow tree. Players must investigate supernatural events and make choices that directly determine the ultimate fate of those involved.
Starting the Quest and Investigating the Curse
To begin A Knight's Tale, head to the Castel Ravello Vineyard in Toussaint and speak with Jacob the woodsman. He explains that a nearby weeping willow is bleeding and making sorrowful sounds, which he believes is tied to a curse. Geralt agrees to investigate the tree, using his witcher senses to gather crucial clues about the spirit trapped within.
By examining the weeping willow, Geralt discovers a lock of hair and a book detailing the sad story of Daphne and her lost lover Gareth. The witcher determines that Daphne's soul is bound to the tree due to a powerful curse born from grief. To free her soul, Geralt must journey to Lynx Crag to find Gareth's remains and recover a vital quest item.
The Journey to Lynx Crag and Meeting the Witch
Upon arriving at Lynx Crag, Geralt discovers a hut belonging to an old witch who holds key information regarding Daphne's tragedy. Players can choose to negotiate with the witch or fight her to secure the witch's bone needed for the ritual. Choosing to cooperate with the witch often provides deeper insight into the curse's true nature without unnecessary violence.
If you peacefully resolve the encounter, the witch explains how the curse can be lifted properly using Daphne's handkerchief and Gareth's remains. Geralt must ensure all steps are executed precisely to avoid provoking the tormented spirit. Returning to Jacob with the necessary ritual items sets the stage for the quest's critical decision point.
Key Choices and Potential Endings
When Geralt returns to Jacob at the weeping willow, you must decide how to proceed with the ritual to break the curse. If Geralt completes the ritual correctly with all necessary components, Daphne's spirit is peacefully released, allowing her to move on to the afterlife. This outcome results in a peaceful resolution for Jacob and restores tranquility to the area.
However, if Geralt fails to perform the ritual correctly or misses key items, Daphne transforms into a dangerous wraith known as a Banshee. Defeating the hostile spirit completes the quest but leads to a much darker outcome for Jacob and the surrounding forest. Navigating these delicate choices highlights the deep narrative complexity that makes Toussaint's adventures so engaging for players.

Best Lightsaber Crystals KOTOR 2 Powerful Crystal Choices And Locations ...
Building an effective lightsaber in Star Wars Knights of the Old Republic II: The Sith Lords requires a careful selection of modification crystals. These items grant significant enhancements to weapon damage, critical hit chances, and specialized force attributes. Understanding where to source the strongest options allows players to customize their combat style effectively across various planet missions.
The Name Crystal and Character Scaling
Your personal crystal, often referred to as the Name Crystal, stands as the single most versatile upgrade in the game. It scales in power alongside your character's level every time Kreia re-attunes it for you aboard the Ebon Hawk. This dynamic scaling makes it an indispensable core component for any Jedi character build throughout the campaign.
To maximize the stats provided by your personal crystal, interact with Kreia after every few level gains. The crystal automatically adjusts to offer higher damage bonuses and improved attribute multipliers based on your current light or dark side alignment. Utilizing this feature guarantees a strong foundation for both single-blade and dual-wielding setups.
Top Power Crystals for Maximum Combat Output
The Upari crystal offers one of the highest raw damage boosts available in the galaxy. Combined with excellent attack bonuses, it helps ensure that heavy strikes bypass enemy defenses with ease. It is frequently discovered late in the campaign during major planetary storylines or high-level merchant restocks.
Another exceptional choice is the Barab Ore Ingot, which adds significant fire damage and critical hit potential to your attacks. Acquiring this rare modification gives dualists a decisive edge in prolonged boss encounters. Players can often recover it from rare loot tables or specialized merchant inventories on planets like Nar Shaddaa.
Defensive and Utility Crystal Selections
For players focused on Force abilities rather than pure melee power, the Pontite crystal serves as an outstanding selection. It boosts charisma while generating a bonus to force point recovery during combat encounters. This allows consulars to cast high-tier powers repeatedly without depleting their resources.
The Solari crystal offers unmatched offensive advantages against dark side opponents and Sith warriors. When inserted into a light side character's weapon, it delivers massive light side damage alongside enhanced attack ratings. It can be looted from high-level encounters or hidden security containers in late-game zones.
Where to Find High-Tier Lightsaber Crystals
Many of the most powerful crystals in KOTOR 2 are distributed through randomized loot pools tied to player level. Exploring fully developed worlds like Dantooine, Korriban, and Onderon increases the chances of discovering rare crystals in locked chests. Merchants such as Geeda on Nar Shaddaa also update their inventories with elite gear after completing key trade quests.
To guarantee the best outcomes when hunting for gear, revisit major vendors after gaining several character levels. Completing side objectives and thorough map exploration consistently rewards players with top-tier saber components. Equipping a balanced combination of color and power crystals ensures your character remains formidable against all Sith threats.

Best Lightsaber Crystals KOTOR 2 Powerful Crystal Choices And Locations ...
Building an effective lightsaber in Star Wars Knights of the Old Republic II: The Sith Lords requires a careful selection of modification crystals. These items grant significant enhancements to weapon damage, critical hit chances, and specialized force attributes. Understanding where to source the strongest options allows players to customize their combat style effectively across various planet missions.
The Name Crystal and Character Scaling
Your personal crystal, often referred to as the Name Crystal, stands as the single most versatile upgrade in the game. It scales in power alongside your character's level every time Kreia re-attunes it for you aboard the Ebon Hawk. This dynamic scaling makes it an indispensable core component for any Jedi character build throughout the campaign.
To maximize the stats provided by your personal crystal, interact with Kreia after every few level gains. The crystal automatically adjusts to offer higher damage bonuses and improved attribute multipliers based on your current light or dark side alignment. Utilizing this feature guarantees a strong foundation for both single-blade and dual-wielding setups.
Top Power Crystals for Maximum Combat Output
The Upari crystal offers one of the highest raw damage boosts available in the galaxy. Combined with excellent attack bonuses, it helps ensure that heavy strikes bypass enemy defenses with ease. It is frequently discovered late in the campaign during major planetary storylines or high-level merchant restocks.
Another exceptional choice is the Barab Ore Ingot, which adds significant fire damage and critical hit potential to your attacks. Acquiring this rare modification gives dualists a decisive edge in prolonged boss encounters. Players can often recover it from rare loot tables or specialized merchant inventories on planets like Nar Shaddaa.
Defensive and Utility Crystal Selections
For players focused on Force abilities rather than pure melee power, the Pontite crystal serves as an outstanding selection. It boosts charisma while generating a bonus to force point recovery during combat encounters. This allows consulars to cast high-tier powers repeatedly without depleting their resources.
The Solari crystal offers unmatched offensive advantages against dark side opponents and Sith warriors. When inserted into a light side character's weapon, it delivers massive light side damage alongside enhanced attack ratings. It can be looted from high-level encounters or hidden security containers in late-game zones.
Where to Find High-Tier Lightsaber Crystals
Many of the most powerful crystals in KOTOR 2 are distributed through randomized loot pools tied to player level. Exploring fully developed worlds like Dantooine, Korriban, and Onderon increases the chances of discovering rare crystals in locked chests. Merchants such as Geeda on Nar Shaddaa also update their inventories with elite gear after completing key trade quests.
To guarantee the best outcomes when hunting for gear, revisit major vendors after gaining several character levels. Completing side objectives and thorough map exploration consistently rewards players with top-tier saber components. Equipping a balanced combination of color and power crystals ensures your character remains formidable against all Sith threats.

How To Make Bomb In Infinite Craft With Simple Recipes ...
Infinite Craft allows players to combine simple base elements to unlock complex items, including volatile concepts like a Bomb. Understanding the quickest crafting branches helps players expand their element collection without taking unnecessary steps. By following a clear combination route, you can craft this essential element efficiently and use it for further crafting recipes.
Understanding the Easiest Combination Path
The most straightforward method to craft a Bomb involves mixing basic items like Fire with a Bottle. You can quickly make a Bottle by combining elements starting from Water, Earth, and Plant. Once you obtain the Bottle element, combining it directly with Fire creates the Bomb instantly.
Alternative Methods using Explosion and Energy
Another popular recipe path requires combining Explosion with Energy to reach the same result. Generating Explosion involves combining destructive nature elements, while Energy comes from basic natural forces. Using these elements provides a flexible alternative if you have already unlocked advanced natural concepts in your library.
Using the Bomb Element in Advanced Recipes
After unlocking the Bomb element, it serves as a foundational component for creating larger explosive phenomena like Nukes or Atom Bombs. Combining a Bomb with specialized technology or elemental power opens up hundreds of new crafting possibilities. Experimenting with different combinations allows you to rapidly build out complex crafting trees in the game.
Resident Evil 2 Lion Statue Code 2nd Run Solution Explained ...
Navigating the terrifying corridors of the Raccoon City Police Department during a B-Scenario playthrough in the Resident Evil 2 remake presents players with altered puzzle solutions. One of the earliest obstacles encountered in the main hall is unlocking the Lion Statue to retrieve its essential medallion. Understanding how the second playthrough changes this puzzle helps players conserve resources and progress efficiently through the early campaign.
The Solution for the Lion Statue in the 2nd Run
In the standard first scenario, the combination relies on simple clues found in the officer's notebook. However, entering the B-Scenario alters the required sequence entirely, rendering previous solutions useless. The correct code combination for the Lion Statue during a second run is Crown, Torch (or Flame), and Bird.
Inputting these three symbols into the dial interface instantly unlocks the mechanism. Upon solving the puzzle, you will receive the Lion Medallion required to open the secret underground passage beneath the main hall.
Where to Find the Clue In-Game
While you can input the combination directly if you already know it, the game provides an official way to discover the clue naturally. Players can locate a tin box resting on a table inside the Lounge on the second floor. Examining this box yields a roll of undeveloped film labeled Lion Statue.
Taking this film roll to the Dark Room on the first floor allows you to develop the photograph. The developed picture explicitly displays the Crown, Torch, and Bird sequence. Discovering clues this way adds to the immersive survival horror experience and rewards careful exploration.
Why the Medallion Puzzles Change in B-Scenario
Capcom designed the 2nd Run modes to offer a heightened challenge and a fresh perspective for returning players. By randomizing item placements and changing puzzle combinations, the game prevents players from relying solely on memory. This design keeps tension high as you navigate familiar rooms with new threats.
Managing inventory space effectively is crucial during these alternate runs, as enemies are often more aggressive. Inserting the Lion Medallion directly into the central pedestal frees up vital inventory slots for extra ammunition and key items.
Tips for Surviving the Early RPD Exploration
Speed is essential when navigating the Main Hall and neighboring hallways, especially in the 2nd Run where supplies are tighter. Trying to unlock the statues as quickly as possible allows you to open the underground shortcut earlier.
Always check your surroundings carefully when traveling to the Lounge or West Storage Room. Combining swift puzzle resolution with careful ammo management ensures your character stays alive to tackle the deeper mysteries lurking within Raccoon City.

What Does 3 Way Means in Betting and How Three Way Markets Work ...
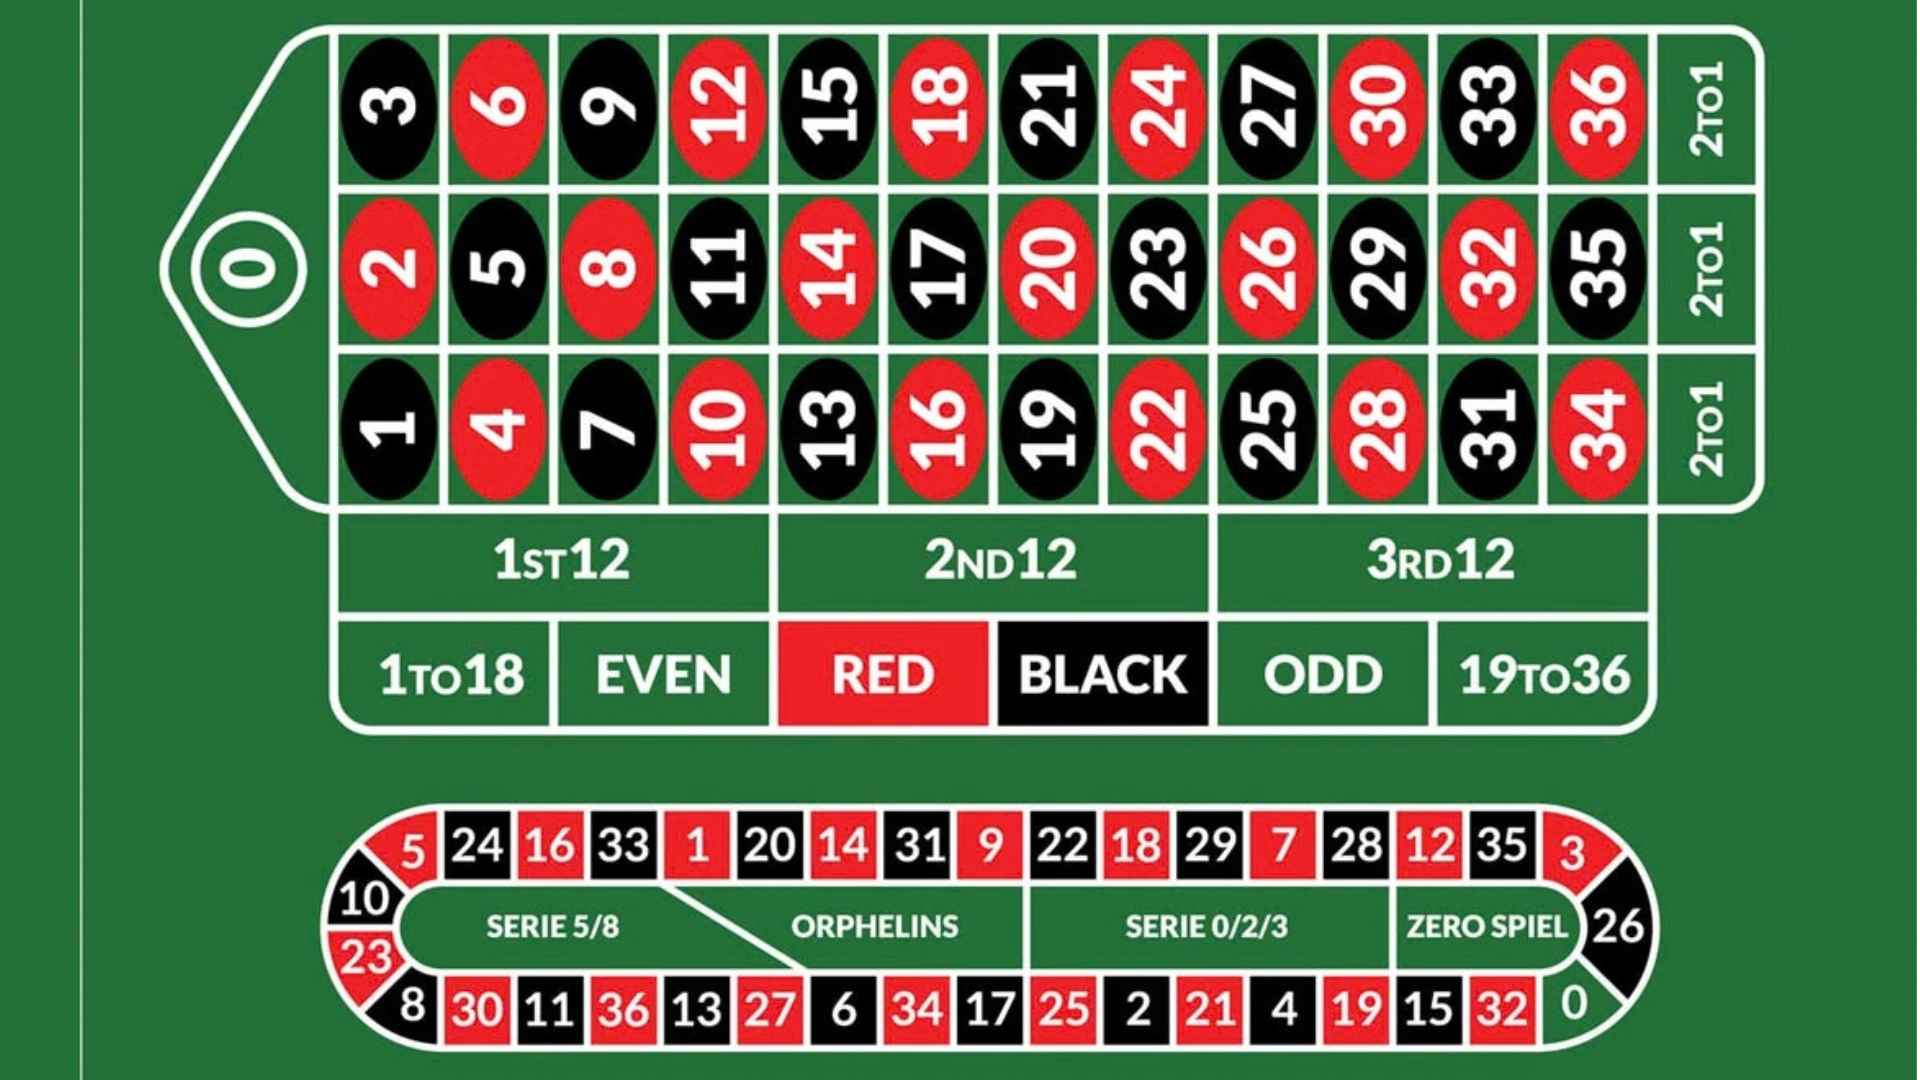
Understanding different wagering formats is essential for anyone looking to navigate sportsbooks with confidence. A 3-way market is one of the most common betting types available, particularly in sports where tied outcomes occur regularly. By learning how these options operate, bettors can make more informed decisions when reviewing pre-match odds.
The Core Definition of a 3-Way Market
In traditional sports wagering, many markets offer only two choices, such as Team A winning or Team B winning. A 3-way betting market adds a third potential outcome to the board, which is a draw or tie at the end of regulation time. This structure means your wager only succeeds if you correctly predict the exact final result among those three distinct choices.
Because the possibility of a draw is factored into the odds, the payout prices for team wins are often higher than in two-way markets. Popular sportsbooks like m88 frequently feature 3-way options for major international competitions. Understanding this setup helps bettors evaluate risk and reward more accurately before placing a ticket.
How Regulation Time Impacts Your Wager
One critical aspect of 3-way betting is that outcomes are evaluated strictly based on standard regulation time plus injury time. Extra time, overtime periods, or penalty shootouts are typically excluded from the settlement of a 3-way wager unless explicitly stated. If a game finishes tied after 90 minutes of regular soccer play, the draw selection is deemed the winning outcome.
This rule makes 3-way markets distinctly different from moneyline markets that include overtime coverage. Bettors who back a team in a 3-way market will lose their stake if the game goes into overtime, even if their chosen team eventually wins in extra periods. Consequently, analyzing a team's tendency to finish games within standard time becomes a vital step in match research.
Comparing 3-Way Odds to 2-Way Moneyline Options
When comparing 3-way lines against standard moneyline markets, the most noticeable distinction lies in the price distribution. In a two-way moneyline, bookmakers eliminate the tie by offering a push refund or forcing an overtime outcome, which lowers the odds on both teams. In contrast, 3-way lines offer higher returns on the favorite because the draw absorbs a significant portion of the probability.
This structure creates strategic opportunities for experienced sports fans who want better value on strong favorites. However, it also introduces additional risk since a late equalizing goal can instantly ruin a team-specific selection. Weighing the higher return against the threat of a regulation tie is the central dynamic of 3-way wagering.
Practical Tips for Betting on 3-Way Lines
To approach 3-way markets effectively, bettors should carefully examine historical match statistics and tactical team matchups. Low-scoring sports often yield a higher percentage of draws, making the tie outcome a viable option rather than just an obstacle. Evaluating defensive records and head-to-head history provides valuable context when judging whether a close contest is likely.
Additionally, managing your bankroll and choosing appropriate market types based on risk tolerance remains paramount. If a contest appears highly unpredictable, alternative options like double chance or draw-no-bet markets might offer better safety margins. Mastering how 3-way markets function ultimately gives sports enthusiasts another useful tool for their overall strategy.

What Is Juice in Betting Understanding the Sportsbook Margin and Betting Costs ...
When entering the world of sports wagering, understanding how odds are set and how bookmakers generate profit is fundamental to evaluating potential returns. The term juice, also known as the vigorish or vig, refers to the commission charged by a sportsbook for taking a bet. Recognizing how this margin built into the odds affects long-term wagering costs is essential for any informed bettor.
The Core Concept of Sportsbook Juice
Juice represents the fee built directly into betting lines that guarantees bookmakers earn a profit regardless of the outcome. Standard lines often feature odds of -110 on both sides of a point spread or over/under total. This setup requires bettors to risk $110 to win $100, creating an inherent transaction cost for placing the wager.
If two bettors place equal wagers on opposing sides of a balanced market, the sportsbook collects $220 in total wagers but pays out only $210 to the winner. The remaining $10 serves as the commission retained by the operator for facilitating the market. Over time, this margin creates a hurdle that requires bettors to win more than half their wagers just to break even.
Calculating the House Edge in Odds
To fully grasp the financial impact of juice, it helps to understand how to convert betting odds into implied probabilities. In a balanced market with no house edge, two equal outcomes would each carry a 50 percent probability. However, when odds are set at -110, the implied probability for each outcome increases to approximately 52.38 percent.
Summing these probabilities yields a total market implied probability of 104.76 percent, with the additional 4.76 percent representing the bookmaker's margin. Evaluating different sportsbooks, including platforms like m88, allows bettors to identify lines with lower vigorish and reduce their overall transaction costs. Comparing these margins is a practical step toward improving efficiency in sports wagering.
How Betting Costs Accumulate Over Time
While a standard commission of under five percent may seem minor on a single bet, its cumulative effect over hundreds of wagers is substantial. A casual bettor placing frequent small wagers continually pays this small fee, which steadily eats into overall bankroll growth. To achieve long-term profitability, a bettor must achieve a win rate above 52.38 percent on standard lines.
Even slight increases in the juice, such as moving lines from -110 to -115, raise the required win rate even further. This makes line shopping and understanding pricing variations critical components of bankroll management. Identifying operators that offer reduced juice lines can significantly lower the breakeven threshold over an extended period.
Strategies to Minimize the Impact of Juice
Bettors can employ several strategies to mitigate the ongoing cost of sportsbook margins. Comparing lines across multiple operators ensures that wagers are placed at the most favorable odds available. Taking advantage of promotional reduced-juice days or special odds boosts can also temporarily eliminate or reverse the house margin.
Additionally, focusing on markets with higher liquidity often leads to tighter margins and lower overall fees. By continuously analyzing betting costs and calculating market margins, bettors can make more strategic decisions and manage their funds more effectively.
Semua artikel sudah ditampilkan.